This documentation is applicable to our TPE-N300PCIED2, TPE-N300PCIED3, and TPE-N300PCIED4 PCIE wifi cards.
Step 1: Unplug the power cable, and any other cables that may hinder access to the system. It's usually advisable to touch the power supply to discharge any static electricity. The world probably won't end if you don't, but it's still a good idea to do this to avoid the slight chance of damaging a component.
Step 2: Remove the case, or more than likely the side panel of the PC so you can get at the PCIE slots:
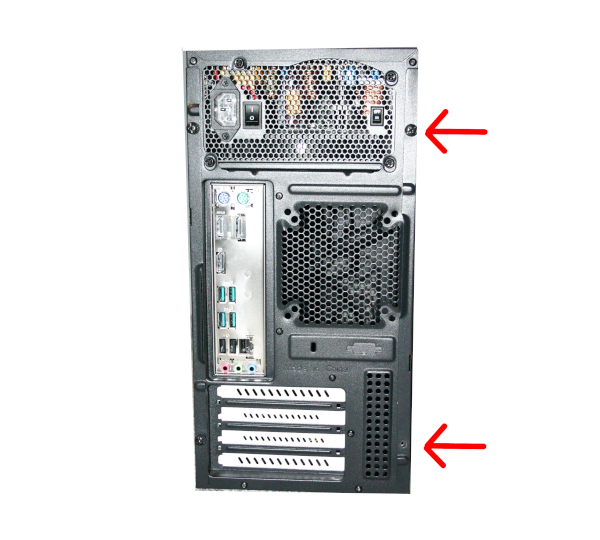
If you look at the back of most traditional desktop cases like that pictured here of our Penguin Pro series desktops you'll notice two screws (possibly thumb screws) that hold the side panel on, unscrew these and pull the side panel off, notice it's the one to the right if your looking at the back of the computer:
Step 3: Identify the PCIE slot you want to install the wifi card in. The "size" of most wifi cards for traditional desktops that fit the traditional PCIE slot are x1 and this includes all of our desktop PCIE wifi cards. What this means is that any of the PCIE slots are compatible with the card. Whether it is a short x1 slot or an x16 slot. The card won't utilize the full length of a longer x16 slot, but it'll still insert fine, and work as designed.
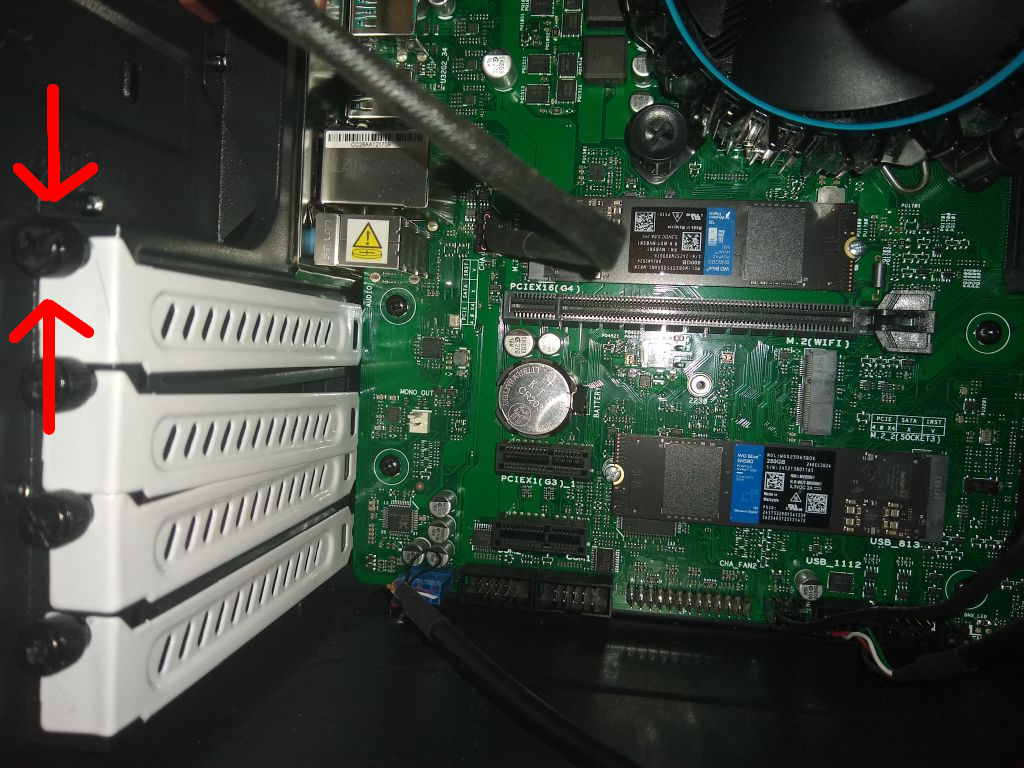
In the picture here we're identifying an x16 PCIE slot for our wifi card:

Step 4: Remove the PCIE cover by removing the thumbscrew/screw from the slot where your going to install the PCIE wifi card (as shown here):
Step 5: Physically insert the PCIE wifi card. This is a little hard to show via a picture, but fortunately we have a video demonstrating this.
Watch the video below on how to install a PCIE card (starting at about 1 minute and 30 seconds):
Step 6: You should now screw the card in, that is to screw back in the screw you removed to take the PCIE cover off.
Step 7: Screw the side panel back on.
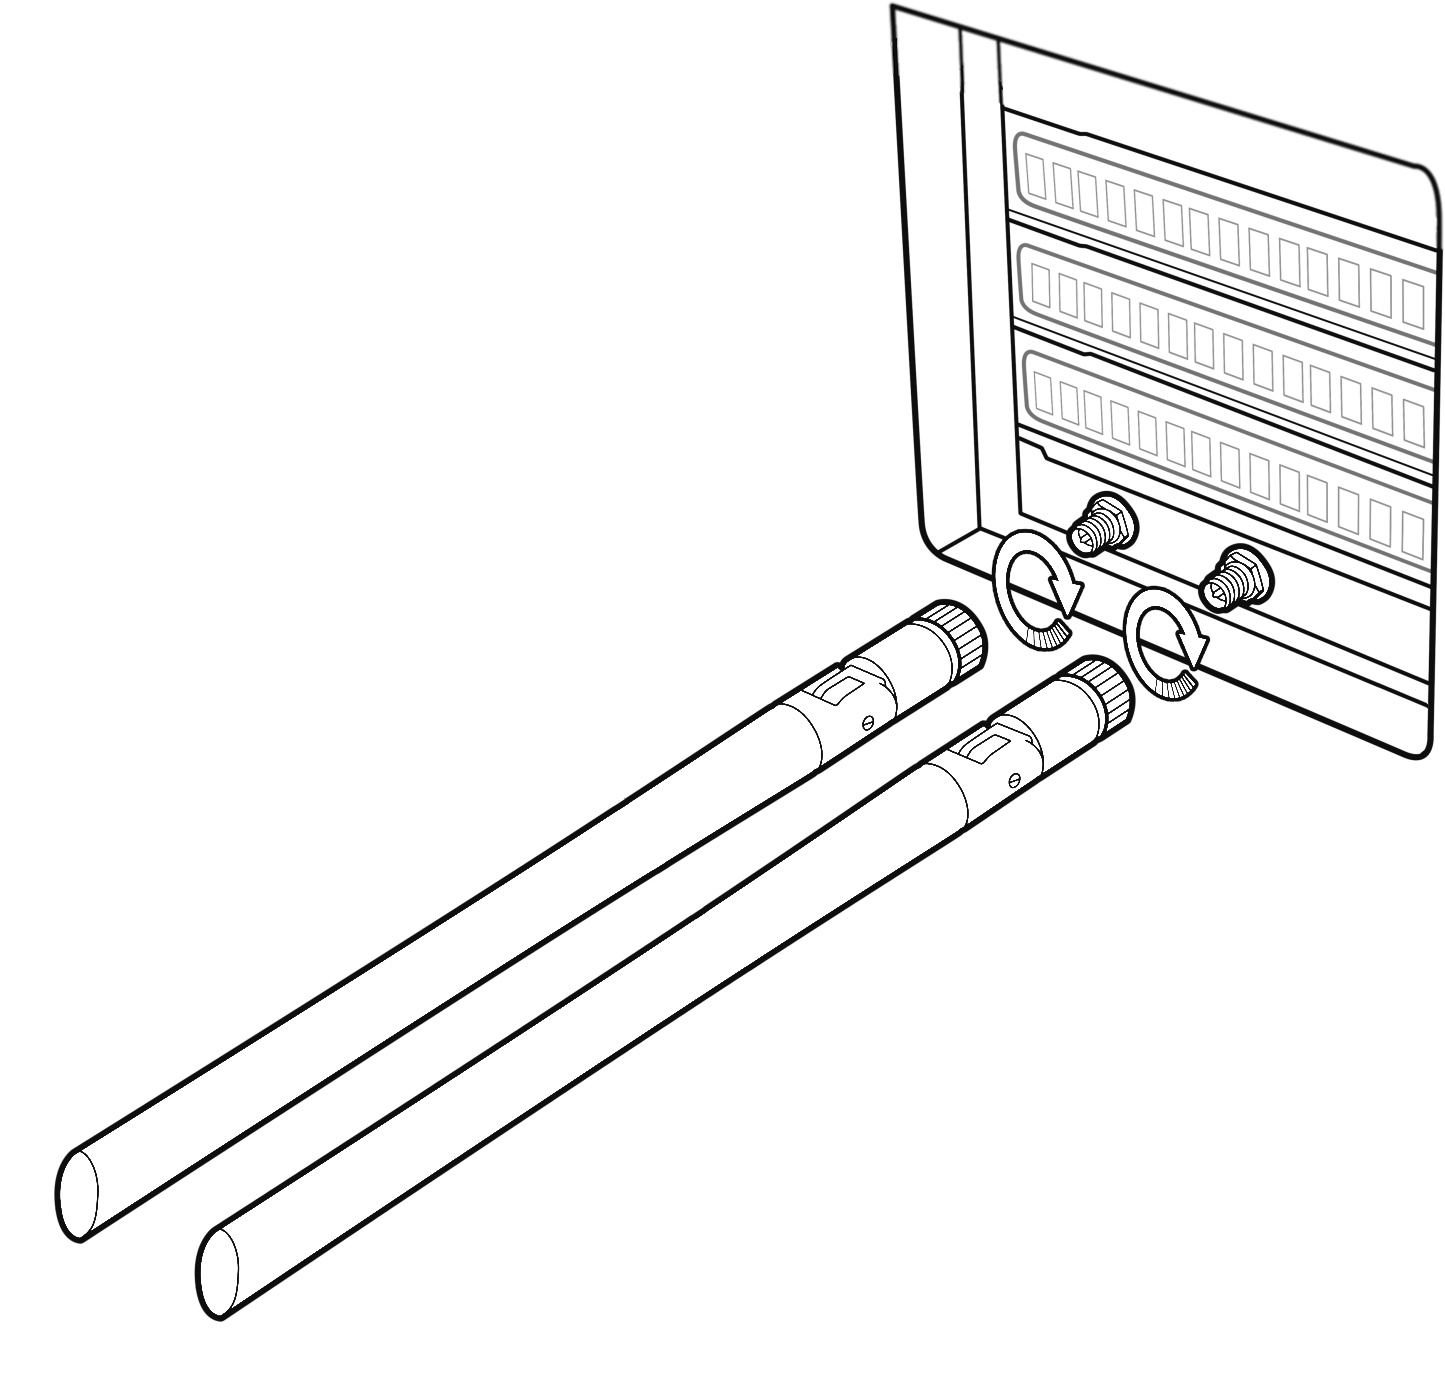
Step 8: Screw on the antennas to the antenna connectors on the back of the PC.
Step 9: Plug the power and other cables back in, turn the computer on, and login.
Step 10: Identify your network applet and select the access point appropriate to connect to your wireless network.
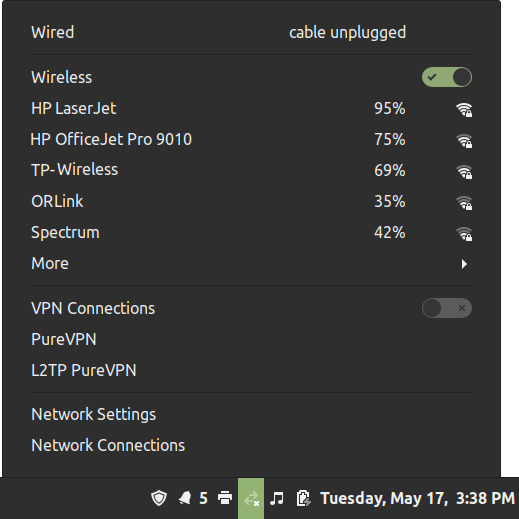
If your wireless network requires a password to connect it should prompt you for the password. Enter it, and you should be connected. If you don't know the password you may be able to find it by looking on the bottom of your wireless router or modem. It is pretty common for ISPs and router manufacturers to have the password printed on the bottom of the modem/router.