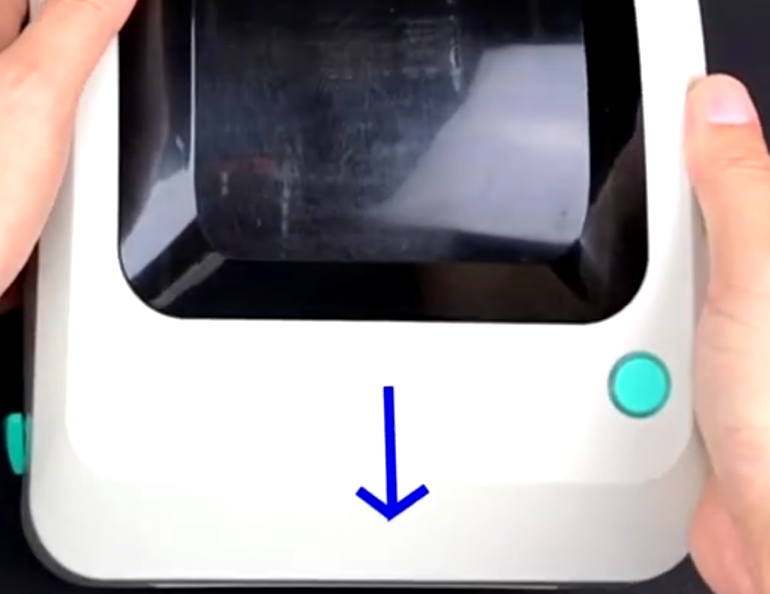
1. Position printer so mouth is facing you
2. Open your label printer by taking both hands and positioning both hand behind the green triangles
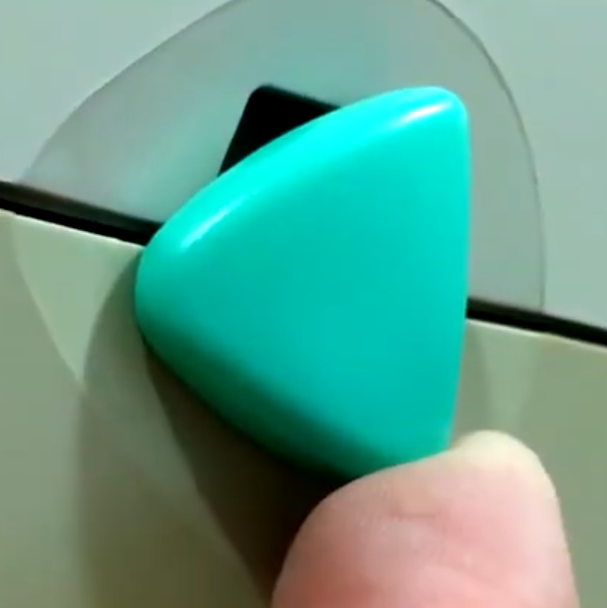
3. Pull the green triangles toward you and then up, this will open the printer
4. Remove the rod located in the middle of the printer
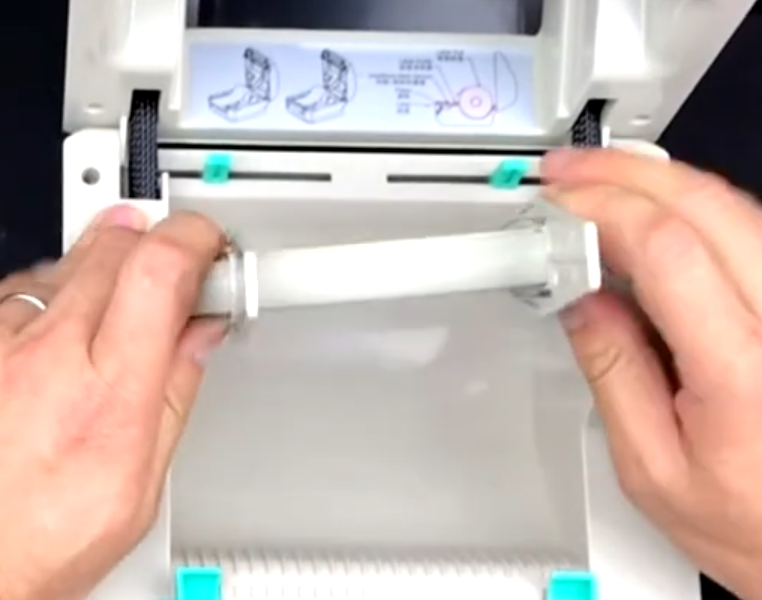
5. Remove one of the shields
6. Place the rod through your shipping label roll
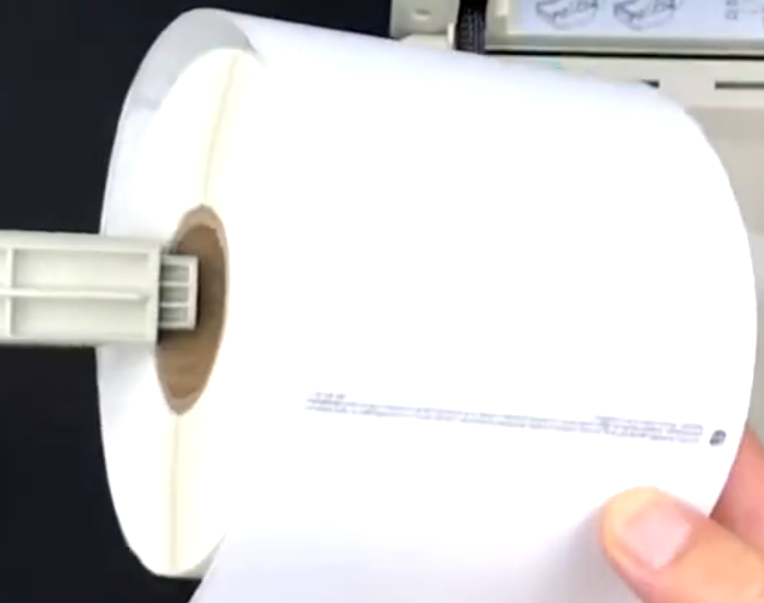
7. Put the shield back onto the rod so that your label roll is between them
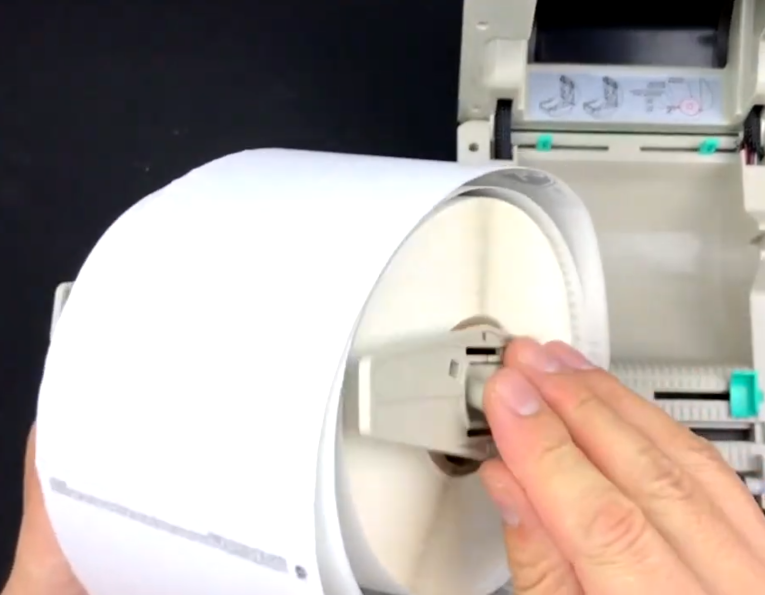
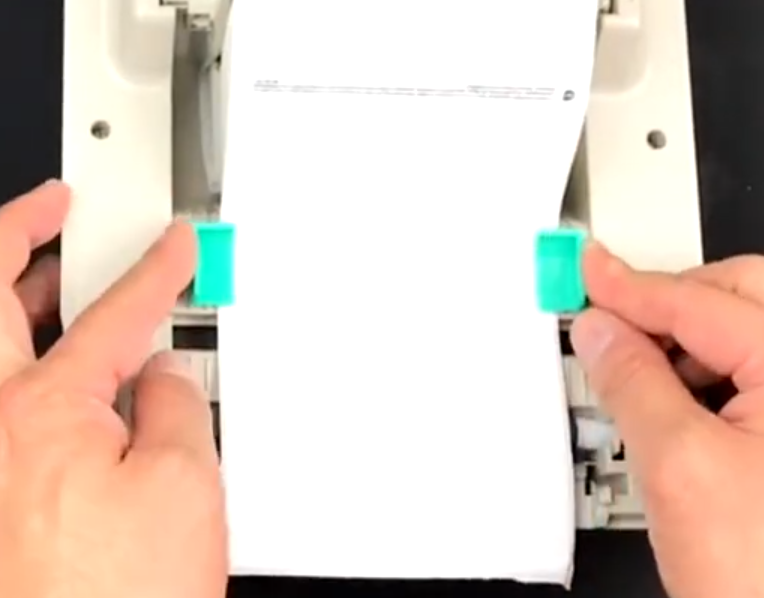
8. Place the rod and shipping roll back into the shipping label printer, be sure the orientation of the roll is correct, you want the first sheet of the roll to be appearing from the top, facing the mouth of the printer, and position the shipping label roll in the center of the rod, take the first sheet out of the roll and position it under and between the two green sliders as shown below, then bring the sliders closer to each other to secure the sheet
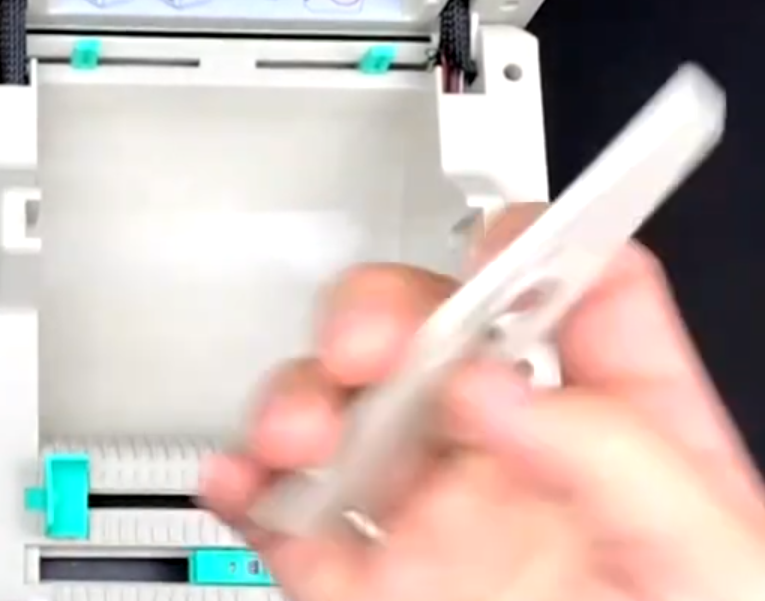
11. You can now close the printer and it snaps into place
12. Connect the USB cable between your computer and printer, or between your router or ethernet switch and your printer if using an ethernet model

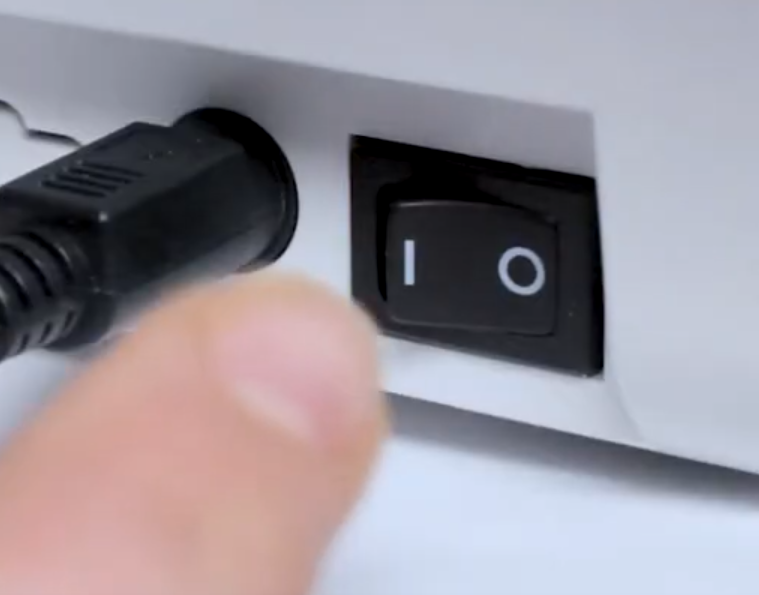
13. Plug in the power adapter and turn on the printer using the switch on the back
14. The LED should light up blue

It is recommended that you calibrate the labels whenever you install new labels. To do that follow these steps:
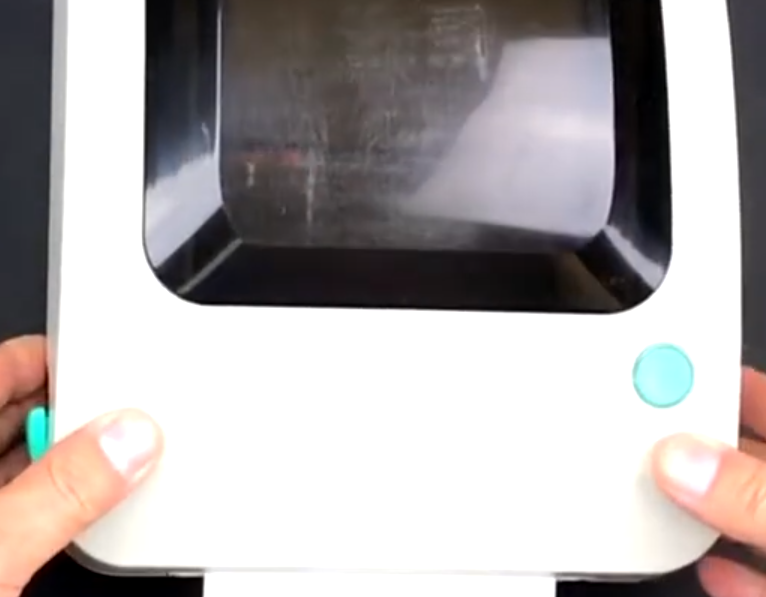
Start calibration: Press and hold the green button on top of the printer for about 2 seconds, then release immediately.
Verify success: If done correctly, the printer will push out two blank labels, and the perforated edge should align with the printer’s edge.
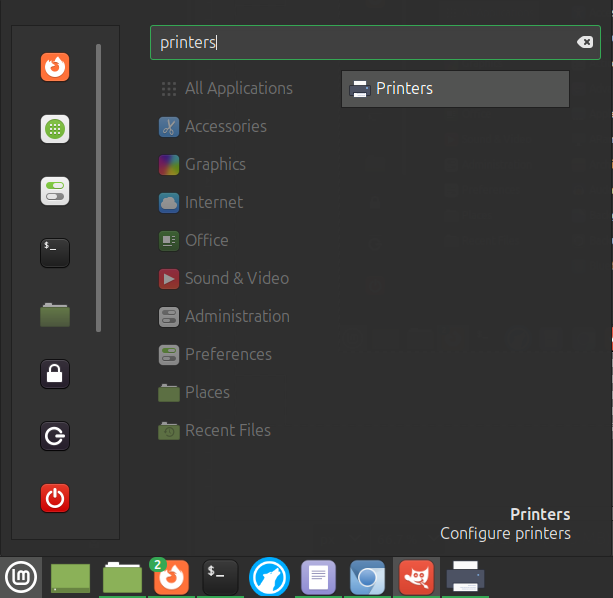
15. Go to the top left corner button (Activities Overview) or the menu in the lower left corner and click it, then search for printers and when the Printers icon appears open printers
16. If you see the new printer right click on it and select Delete
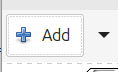
17. Click the Add button to add a new printer (even if you already see the new printer)
18. On the left hand side you will see the printer, select it
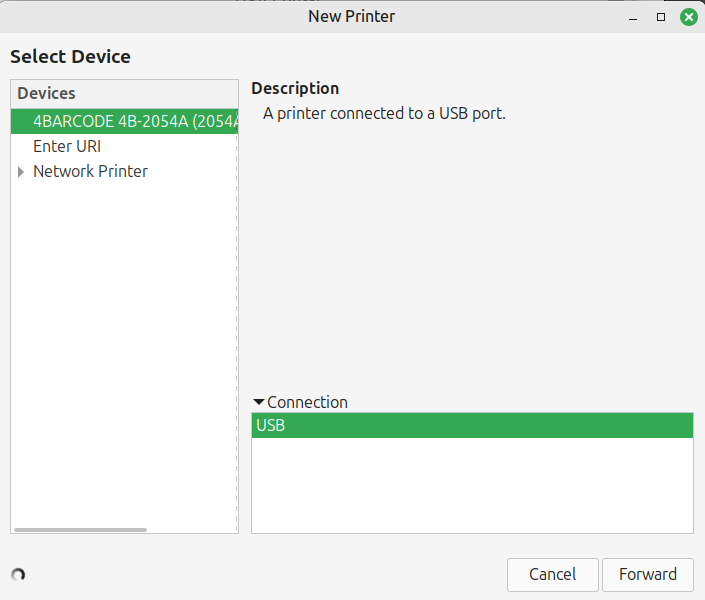
19. Click the Forward button, a Choose Driver menu will appear
20. Under Makes scroll down to the bottom and select Zebra
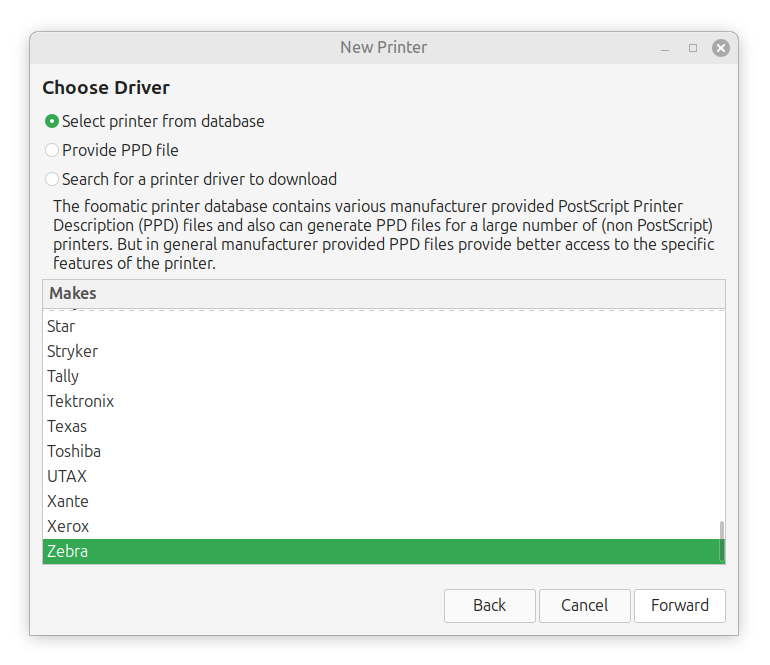
21. Click the Forward button
22. On the left hand side under where it says Models select ZPL Label
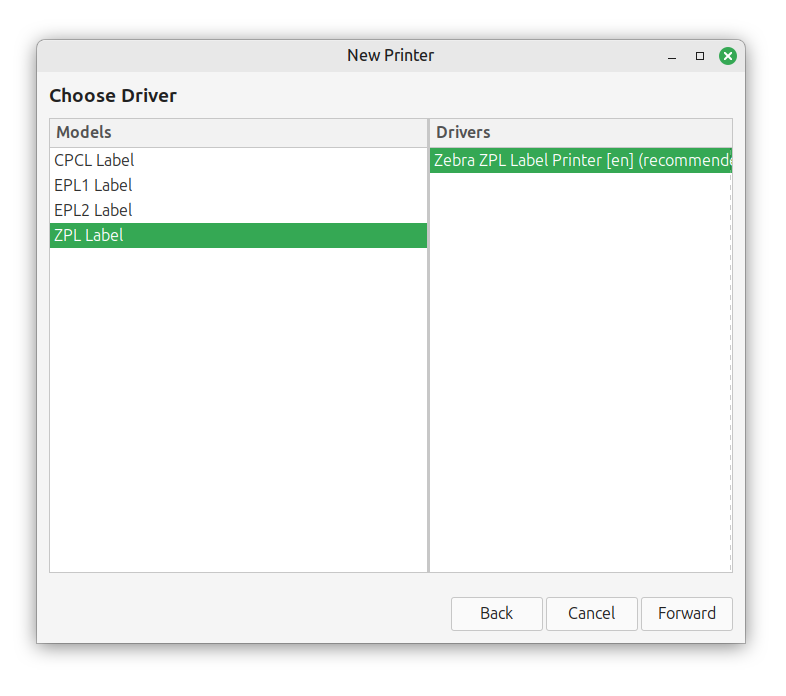
23. Click the Forward button
24. Choose a name for the printer and enter it into the name box
25. Click the Apply button
26. You will be prompted to print a test page, don't do that yet
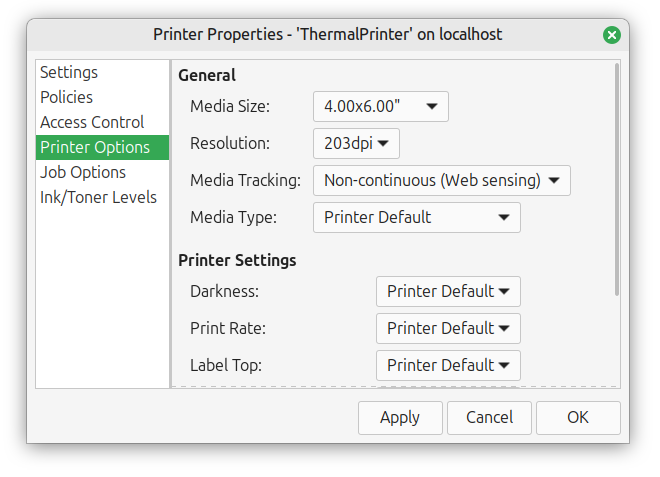
27. Right click on the newly added printer and select properties
28. Under Printer Options make sure the media size is set to 4 x 6" if your using standard 4 x 6" shipping labels (not 6 x 4 " or any other incorrect settings)
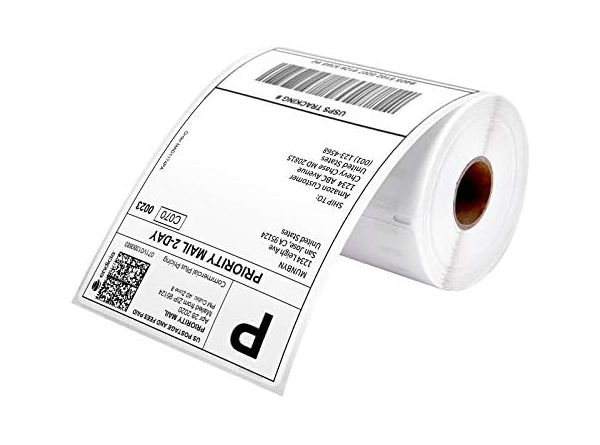
You can buy 4 x 6 shipping labels here if you need them
29. Click OK
30. Open a 4x6 sample label and go to print
31. Under Paper size make sure 4 x 6" Borderless is selected, or whatever size label you have selected to utilize
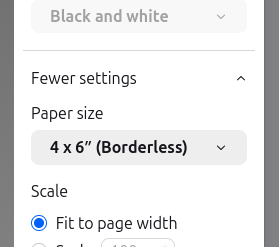
32. Click the print button
Note: If you have 4 x 5" Borderless selected or something that isn't correct the printer may not print anything and even shut off on you. It's critical to make sure the settings are correct for the label you are printing both in printer settings and when printing. If you have a label size that is not shown in printer settings continue reading.
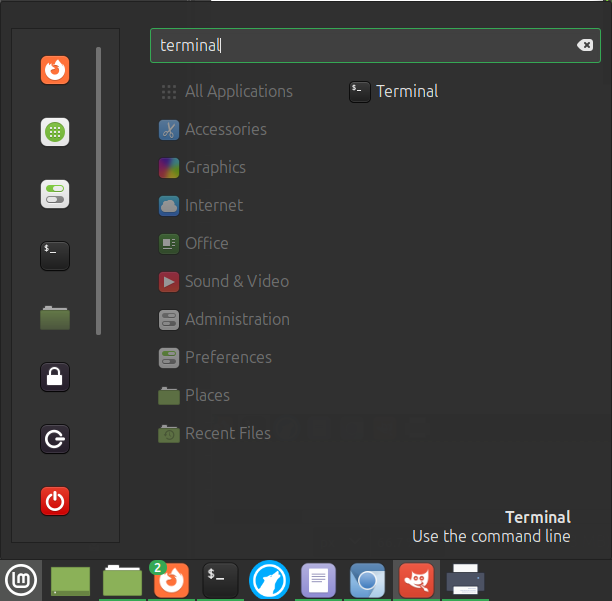
33. If you need to print on labels other than 4x6" or otherwise not in printer settings you can manually add a custom label size by opening a terminal window and running a command.
From to the top left corner button (Activities Overview) or the menu in the lower left corner and click it, then search for terminal and when the Terminal icon appears open the Terminal application like so:
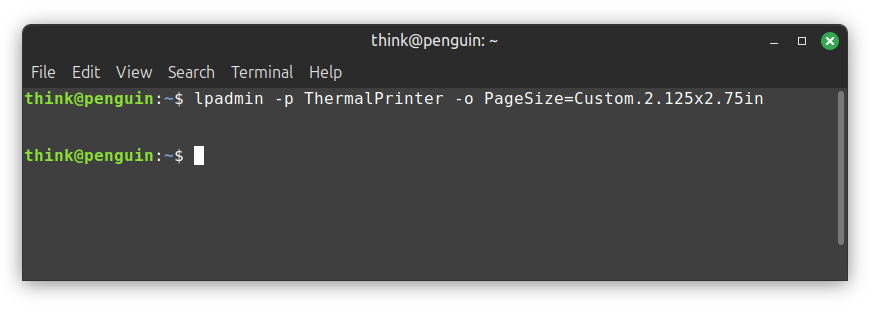
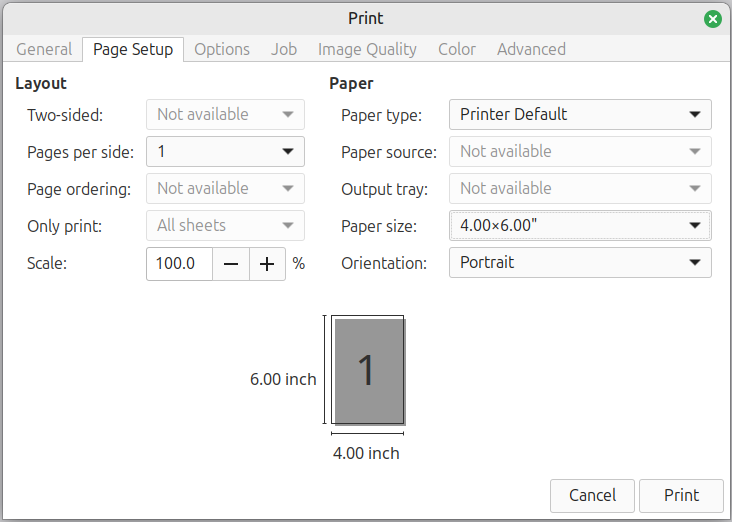
34. Run the following command by typing it into the terminal and hitting the enter key afterward, but replace ThermalPrinter with whatever you named the printer, and replace 2.125x2.75 with the size of your labels:
35. In the example above we added 2.125 x 2.75" labels so we're going to open up a sample label to do a test print from the company we bought the labels from
In this instance the sample labels we're testing are from onlinelabels.com
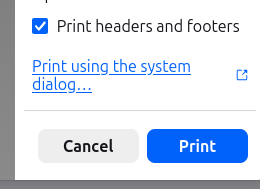
36. Once you've opened the sample label click the print icon and depending on the application, distribution, and release you may need to click a link if you scroll down that says print using the system dialog as shown here:
37. Once the system's print dialog is open we're going to select our thermal label printer and then click on the Page Setup tab like so:
38. In the Paper Size drop down we're going to scroll down to select 4x6
To create a unique custom label and print it, rather than the sample, you can use GIMP or another application with the same specifications for the document or image